
Streamlining Quality Control with EstVis Checklists
Learn how EstVis’s customizable Checklists feature streamlines quality control by prompting employees to complete essential checks and questions during RO’s status changes. This guide covers creating, customizing, and managing checklists for improved workflow accuracy and compliance, with audit trails and PDF records for manager review. Perfect for ensuring thorough, consistent case management across your team.
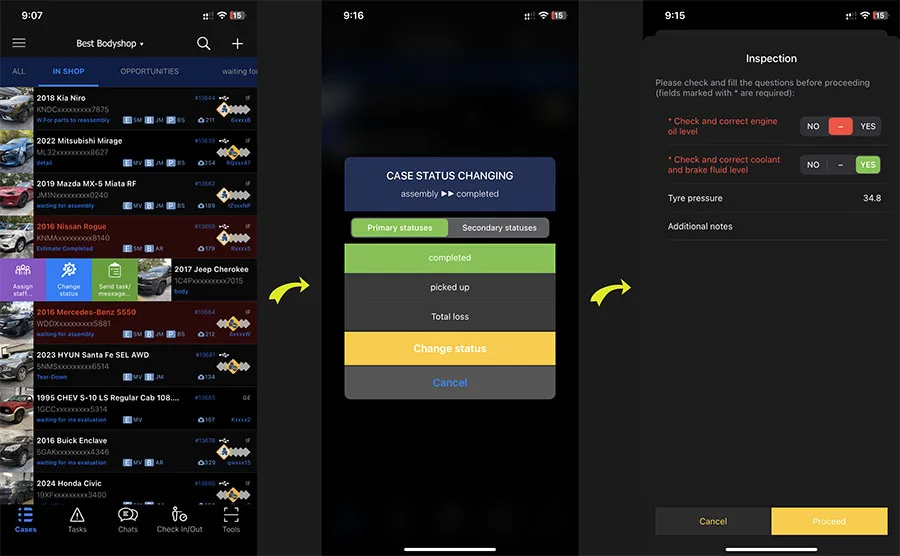
EstVis includes a robust Checklists feature that empowers employees to ensure accuracy and accountability while transitioning a case (RO) through various repair statuses (we call them buckets). This feature prompts team members to complete specific checks and answer relevant questions, providing a thorough review as cases move through different stages.
Customized Checklists for Targeted Quality Control
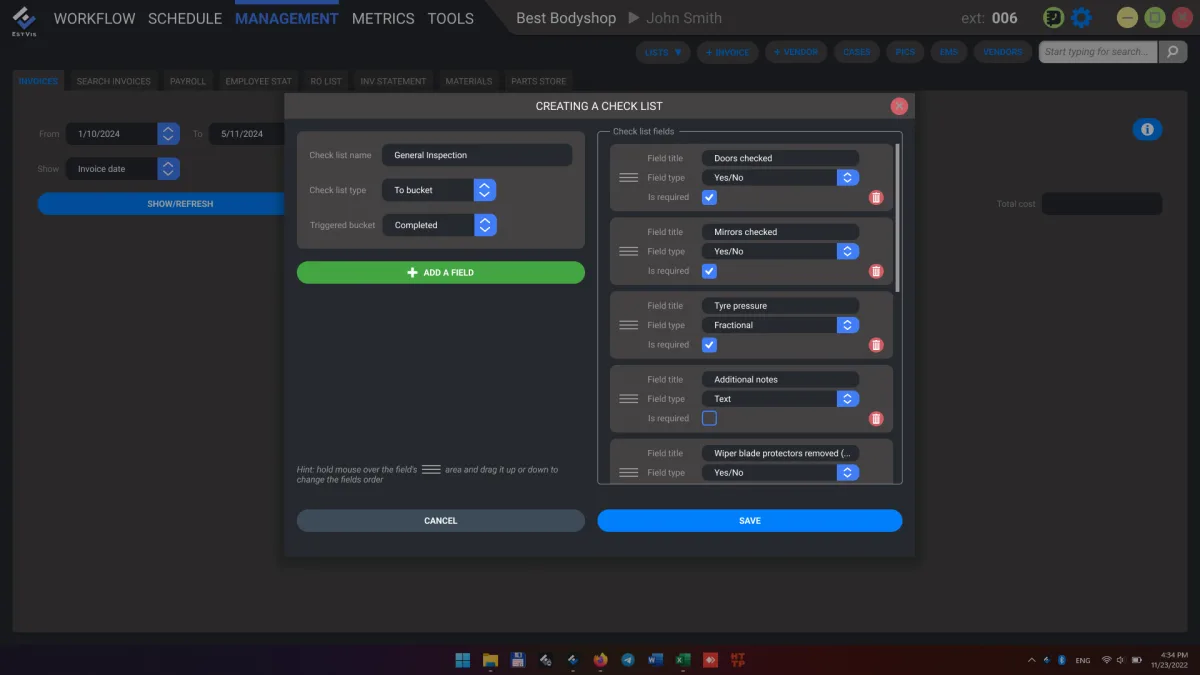
With EstVis, checklists are fully customizable by users with owner or manager role. Each checklist can be assigned to a specific bucket, triggered as a case moves between buckets on the board – either From bucket (initiated when moving from the status) or To bucket (initiated when moving to the status). This flexibility allows managers to configure exactly when and where checks are needed within their workflows.
Checklists can include both required and optional questions and support various response types, such as Yes/No, integer, fractional values, text input, and images. For instance, a required field might demand a Yes/No response, while optional questions allow users to skip fields as needed. This flexibility streamlines user input while maintaining necessary accountability.
Seamless Integration with Workflow and Audit Trails
As a user moves a case between statuses with an assigned checklist, they must complete the required fields, ensuring that all critical data is logged before a status change. This process not only enforces compliance but also provides managers with a clear audit trail.
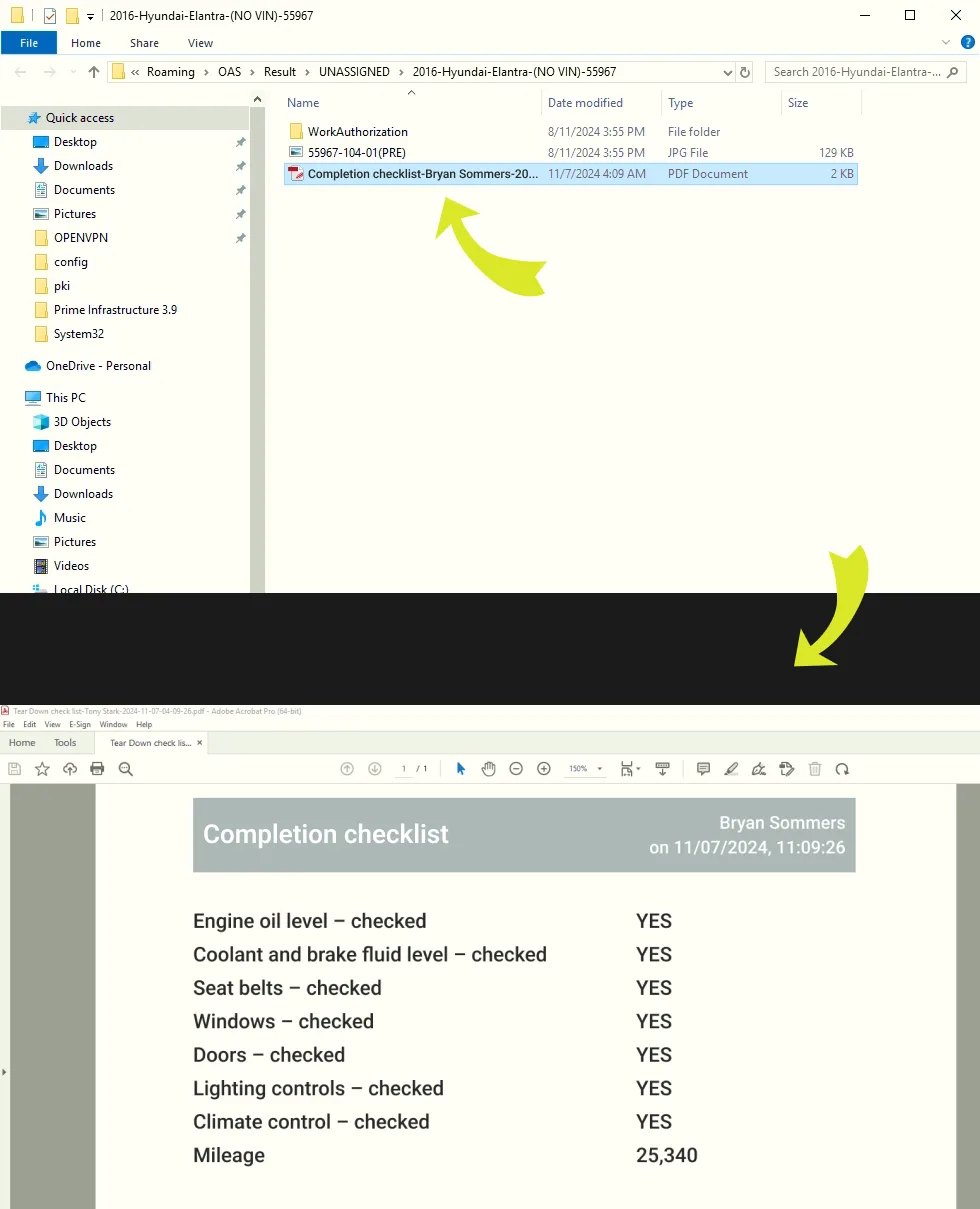
EstVis automatically logs the completed checklist details, including the username, date and timestamp into the system database. Managers can access these records through the Workflow interface under Case History, and a PDF copy is generated and saved in the Case Result folder on the Desktop Server’s hard drive.
Creating and Customizing Checklists in EstVis
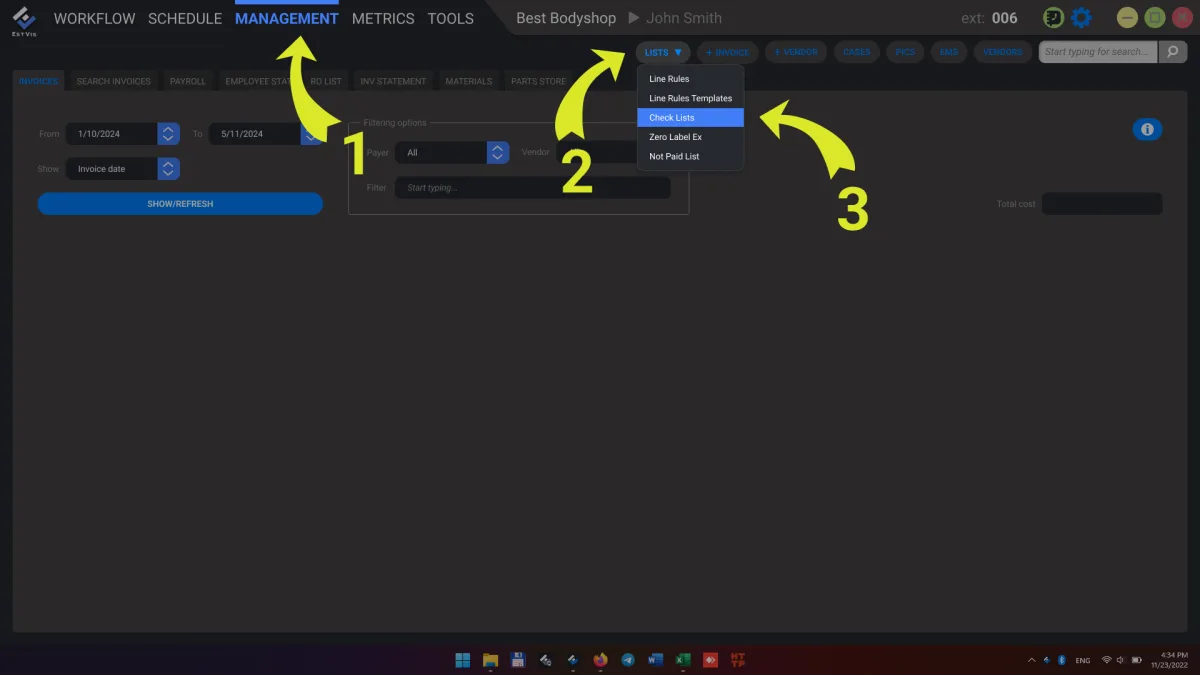
Customization is accessible through the EstVis Workflow interface:
- Navigate to the Management tab in the top left.
- Click on the Lists button in the top-right panel, and select Check Lists.
Steps to Create a New Checklist:
- Select Add Check list.
- Choose a display condition: From bucket to show when moving a case from the status or To bucket for displaying when moving to the status.
- Select the specific bucket under Triggered bucket.
- Add fields as needed and select the answer (field) type for each (e.g., Yes/No, text, etc).
- Check the Is Required box for fields that require user input.
- When complete, click Save.
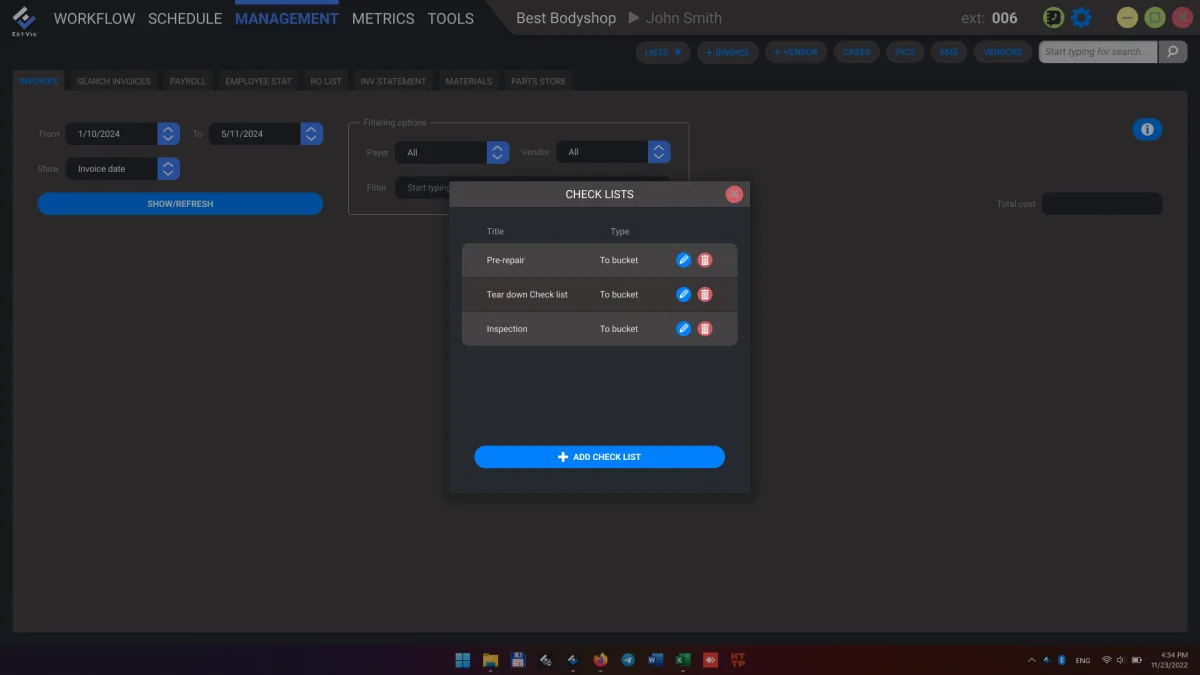
Editing an Existing Checklist:
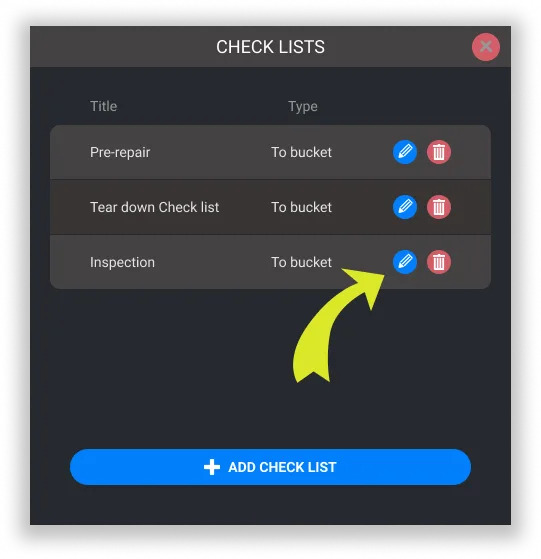
To modify a checklist, simply click the Pencil icon next to the existing checklist item.
EstVis customizable checklists streamline workflows, enhance compliance, and provide a reliable history for management – ensuring each case is handled with precision at every step.